
Hey there folks
We have been developing the Multi Generation lamination concept in the shop and here are some pics to bring you up to speed without 1000 words per picture.
First you make a stick, preferably a pretty stick like the one above.
For now it is important you have a uniform pattern in the coloration and dimensions of each piece.
Above you see Maple with Satine, or what is also commonly called 'bloodwood' and a center of Ebony as a highlight kicker.
This is the first generation of this multi generational piece or the first lamination or glue up. As you will see each consecutive glue up gives birth to a new pattern or design.
 Above we see the beginning of the second generation with the formation of what are called 'chevrons'. Chevrons are the 'Sargent stripes' design , created with a 15 degree cut and a flip of the wood.
 Now we are getting somewhere.
With the zig zag 2nd generation we can begin to lay out where the cuts will be to form the 3rd generation. I have chosen peek to troft and drawn in with pencil. Above you can see the paper mach up which is a must. I wall ways first make it with paper before cutting wood.

Now we begin to see the design on wood of the 3rd generation laminated design.
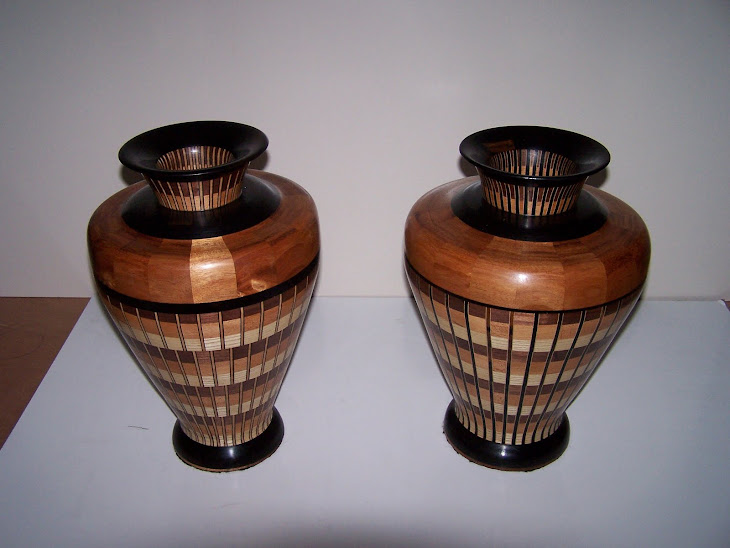
And this is where we end.
Why?
Well, what it becomes from here is the real fun.
I could place 22 degree cuts and with 'stay' or vertical construction make a kickin vase. This is also a a great pattern for a lazy Susan and or cutting board.
There are just so many things you can do from here, it is endless and that is one of the many reasons I like the multi generational lamination concept. The variables are endless, the potential artistic expression is without measure. Every mistake leads you to a new design with its own applications.
So have fun with it and send me a pic of what you create.
Steve


No comments:
Post a Comment