Monday, December 31, 2012

New Kids Program and the upcoming Schedule

Wanted to post my schedule for
 lectures along with some pics of interest.

I will be at the :

Nashua Public Library on Monday Feb. 4th beginning at 6:30 2 Court St. Nashua NH
Lecture topic: General Wood craft
Epsom Public Library on Tuesday April 2nd beginning at 6:30 
Lecture topic: General Wood craft

Be there or be .... well you know.


Beginning a new program

Kids and Wood working

Our Kids evening in Concord was such a success. I feel the kids were involved , engaged and generally had a lot of fun. It is a very hands on (no sitting in chairs)  program of basic information on types of wood, tools etc and possibilities on what you can do with woodworking.

Here are some pic's:


On this occasion both the boy scouts and the local kids were able to make the program. The Kid's program went from 5 to 6 ish and the adult program began at 6:30. It was an easy and seamless transition and both groups got a lot out of it. There is a different fee schedule for the kids program. For any Library thinking of both, this is a great way to get multiple generations involved and the biggest bang for the buck , so to speak.
Steve


Wednesday, December 12, 2012

Here is a great question from my friend Matt in Hooksett about hollowing tools


Hey steve,

I hope this email finds you well. I have a question about turning. I am looking into hollow vessel turning and find I am in need of a hollowing tool. Faced with paying north of 100.00 for what amounts to a carbide bit on  a shaft I really don’t know what to do. Can you give me any good feedback? How do you hollow vessels?


Matt

hey there and God bless
Great question
I use some hollowing tools and yes they are expensive but worth every sent. 
As with all lathe tools the closer your tool rest to the cutting area the better and smother the cut. Vibration is the problem so try to get your tool rest into the mouth of the piece as much as possible. the more you extend the tool away from the rest, the more chance of catching , grabbing and tear out.
My suggestion ... spend the money. Hollowing tools are one place where a little more expense in tool makes all the difference.
I do mostly segmented stuff so I hollow as I go, adding rings and hollowing one ring at a time as I add it in place right on the lathe. The tail stock makes a great ring center-er so to speak and  clamp. This way I never have to extend into a completed work or large wood blank. The blank grows so to speak as I add the rings. The tail stock adds pressure to the new ring from tail stock to head stock. A couple of jigs that attach to the tail stock help here with both even pressure in gluing and centering. 
My tool of choice in cleaning the interior is my parting tool followed by my favorite scraper. Usually I will make larger than needed rings to harvest the balance for another use. On both the exterior of your work and the interior you can cut away the unused portion of ring using both the donuts and the donut hole so to speak. 
Also I work from both ends of a piece  (top and bottom on separate face plates like making 2 bowls) to the middle and the last glue up is the two middles glued together. that way you are never working on a small tight opening and extending your tools long distance.
Try that and see if things don't improve.
Steve


Saturday, October 20, 2012

Placing as design or pattern in a vessel


Placing as design or pattern in a vessel

I get a lot of questions during my presentations and woodworking talks and one that pops up almost every time is ‘how did you do that’ while pointing at a design inside a bowl  or vase. How do you take some design that is flat and make round? Good question!

Using the tumbling block design below I will try to go through some of the steps and methods of doing this without going to deep into the ring construction method used to make the rest of the vase.


Above you see the cutting board everyone likes, a basic tumbling block, 3D pattern that is fun to do. Now let’s think about placing it into a vessel.

See below that we have already completed the difficult process of getting good clean diamonds whose 3 parts or diamonds form a single tumbling block.


We then can use these same angles to make diamonds for the top and bottom and longer pieces for the sides. Essentially we are surrounding the design with the same material as our vase. Be mindful during construction to keep the patterns uniform and be sure and make a couple extra as some are bound to be less tight and appealing as others.


Here we are laying out and preparing for the glue up. Remember as you make these single designs you are making one of eight (depending on what you use for a degree and design look, meaning you could form many or more designs in a single highlight ring depending on the look you are after determining the degree of your cut) which means your are determining your vase diameter by the length of the design. Best to start with a vase diameter, determine its circumference and divide by 8 giving you a ball park for the distance from left to right of each design piece.


Here you see it with its rings on the right that will form the sides of the vessel under and over the design ring or highlight ring (I use these interchangeably as the designs are the highlight and they form a ring (one of several) within the vase).


Prepare for the glue up by getting everything in place and each design uniform. Checking for tight joinery and getting the rubber bands out. I use rubber bands for this type of glue up. 6 or 7 thicker ones are more than enough to get you great results. If not the problem is your cutting and accuracy of miter not more clamps.


This next step requires cutting jigs. If you have been to one of my presentations you know how I feel about jigs, all kinds of Jigs. Here I will be laying out MDF for a precise cut making the top and bottom uniform and accurate according to the design in the middle. This cut will then be the basis of the right and left hand cuts so this one is worth getting right.


I love double stick flooring tape which you can get at any Home Depo / Lowes.
It holds everything in place nicely. Remember you are lining up the center design here not the edges of the glued up piece. You want the designs in the center to line up more than just cutting off the bottom and top. The jig will allow you to move the pieces and hold them in place in a way to insure the uniform look of the design in the center of the highlight ring. 


Above I have marked with pencil to insure that my designs are centered.


Here are my jigs all loaded up and ready to rip on the table saw. Use a good sharp blade so you can join right away or keep your jigs in place and run it through the planer and thickness sander if you have one. Mine usually are joined with table say cuts only. A good blade makes all the difference. Mark the outside of your jigs with the lines of the designs from the inside so you know you are taking as much from the bottom of the ring design as the top.


Here they are all 8 just off the jigs with their bottoms and tops perfectly aligned. This perfect alignment is then the basis of the miter cuts to join them.


Again, a cutting jig is essential here to getting a good cut and safety. Also marking to center the design is the key. You can see my mark on the jig below the clamp. It is set for the center of the design not the edges of the piece. The center of the design is the standard to set your cut against. Before the saw is turned on your fingers should be far removed from the entire saw area and the piece should be locked down by clamping with a certainty it will not move or vibrate during the blade pass.


Here we see the cut off with design center lined up with the pencil mark. Keep these cut off’s !!! I have made funky and wonderful small projects (Christmas ornaments especially) with these. They are exact, witch means if you join them correctly they will fit together just as your ring will, making a clever little, whatever.


Here are the segments ready to make into a ring. At this point you can choose to further highlight or not. For example with these Ash rings I will make windows around each design by inserting another wood in between each design segment. On the Black Locust I will not.


This will begin to move rather quickly so I will try to let the pictures speak more.


Check for a good tight fit with no gaps before gluing. If you have less than perfect joints use the half ring method, forming and gluing up half circles and then sanding the two remaining joints to perfect fits. Much easier to work with two joints than 8.
 

Here the highlight rings have been glued up and are ready to go. Notice I inserted a piece of black Locust in between each of the ash rings to make the left and right sides of the windows


Now, finally after weeks we have something to put on the lathe. Centered we begin to add rings as we go. The top and bottom of course will be black locust in order to close our windows for each design highlight. Rings of Brazilian walnut help to further highlight.


The black locust vase will be plainer and less decorative by design.


I use a lot of weight instead of clamping. Make sure the weight is evenly distributed or it will show in wider than necessary glue lines. Check out my post on PVC for more info on that.


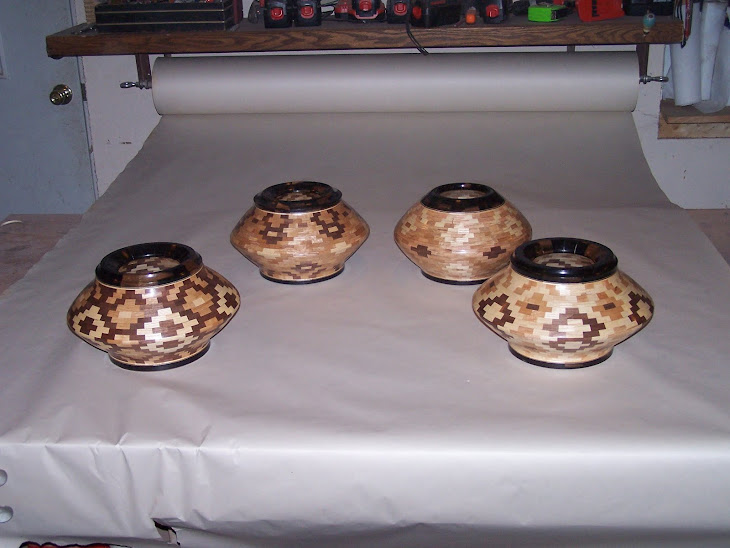
Here is the ash vase with the black locust windows and Brazilian highlights. All in all I think it came out good. Not great but a solid good.


Interior shot.


Here is the black locust with no extra highlights. My wife likes this one best. Sometimes less is defiantly more. For me I like the more complex designs and therefore the ash with highlights. Sometimes less is defiantly less, right?
Anyway, whatever your preference or design choice these steps can help you get something whose design is flat (cutting board) and design it into something round.


Keep turning and be safe

Steve
10/11/12

Thursday, September 13, 2012

Lecture Schedule


Lecture Schedule
Fall 2012
You know how I love to see you at these shows, so if you are in the areas please make them part of your day.
Most all talks start at 6:30 or 7:00
Oct 3rd                                  Marlborough NH             Frost Free Library
Frost Free Library  28 Jaffrey Road  PO Box 457  Marlborough, NH 03455


Oct 9th                             East Kingston NH       EasKingston Public Library
East Kingston Public Library, 47 Maplevale Road

Oct 30th                            Stratham NH             Stratham Public Library
Wiggin Memorial Library  10 Bunker Hill Ave    Stratham, NH 03885


Nov 6th                            Litchfield NH            Litchfield Public Library
Aaron Cutler Memorial Library  269 Charles Bancroft Hwy.  Litchfield, New Hampshire 03052
603.424.4044 

Nov 15th                         Salem NH                    Salem Public Library
Kelley Library  234 Main Street  Salem, NH 03079  603-898-7064


Nov 27th                         Concord NH                Concord Public Library
Concord Public Library   45 Green Street  Concord, NH 03301  (603) 225-8590           

Nov 29th                         Hooksett NH                Hooksett Public Library
finishing off the year with a talk in my home town of Hooksett

PVC and your shop, a wonderful combination


PVC and your shop, a wonderful combination
Having used PVC pipe in plumbing and other projects it was only a matter of time before it became a staple in my shop. Here are some of the most obvious uses. I would encourage you, dear reader to think up more ingenious uses and tell me about them.

Used to center the weight during the glue up:

One problem I was having was an unnecessarily wide glue line in-between my rings. I discovered that often this was due to uneven weight distribution or placing weight (sometimes I use my old workout weights instead of clamps) in the center of a wider ring causing a push out or cupping effect making the glue lines noticeably wider around the circumference of the rings. The solution was simple; distribute the weight evenly and directly over the glue up area. PVC in the 6, 8 and 10 inch come in real handy for this.

Used to lengthen your tool handles:

I love long tool handles but they can be a pain to store, so I simple use one and a half or one and a quarter PVC and jamb them into the handle ends and now your tool handle is as long as your comfort zone. A dowel in the non tool end with a tap or two and it is released and ready to be put back in the drawer. For this I would suggest schedule 40 or the heavier PVC pipe as a means to reduce vibration.


As a storage device for face plates:

Face plates can be difficult to store and work with off the lathe. 6 inch PVC 6 or so inches long and you are no longer chasing them across the shop floor or scraping your countertops with the threaded end of the face plate.

As tool storage on your lathe or counter top or wall area:

This is one I use constantly. Using multiple lathe tools on a project can give you a mess or at least spending too much time finding a tool you just put down. Attaching different diameter lengths of 4 to 6 inches gives the storage right where you need it. Believe it or not on some projects every one of these has one tool or another in it. You will notice here that I also place weight on my lathe bottom. The more the merrier as it is an eliminator of vibration to a lathe that is not bolted to your shop floor.


As a storage area for drills and screw guns:

Organizing my screw guns with PVC was one of the best and most productive things I did with PVC. I picked it up off a woodworking mag and man am I thankful. The biggest benefit was the mess it cleaned up and the counter top space it freed up. Here you see 10 to 12 inch 4 inch schedule 40 with the first 4 to 6 inches of its bottom in a 2 inch width cut away and mounted to the underneath of a counter area. The guns or drills slip in like a holster. In between the guns I have mounted the chargers so the batteries you see are recharging while being stored.

Finally, I use PVC as a dying chamber:

I have been using wood dye as a means of getting different effects and accents in my projects. It began with ‘ebony X’ a process of using vinegar and rusted metal to make veneers of walnut and darker wood jet black. Since then I have been experimenting with many colors, red, blue, green and yellow for example add highlighs to many segmented projects with a huge wow factor. They are especially useful in my game board work highlighting and distinguishing the boards.  I will not take the time here to go over the process but as you can see each color has a ‘dying chamber’ made from PVC. The veneer is cut into one inch by 36 inch strips. Dates are used to determine the proper exposure time to the dye and they are rolled every week or so to make sure the dye impregnates the vineer uniformly.  Usally then are in the tubes for a couple of months at a minimum.

So there you have my PVC extravaganza. Remember an organized but messy shop is better and safer by far than an unorganized clean shop.

I look forward to your feedback and responces.
Please feel free to contact me at:
Or just leave a comment on the blog.


Tuesday, July 17, 2012

Just a quick note to my wandering fans
I will be at the Amherst Public Library on the 24th of July, 
Always love those familiar faces.
Also on the schedule for this fall are:
East Kingston
Stratham
Salem 
Concord
Hooksett

Hoping to see you at a lecture or too

Steve
3D Triangles
Here is another design on the right, with many of the same characteristics in the tumbling block design. I call this design the tumbling triangle design although I am sure it has many names. Since many of the techniques are similar I will spare you a lot to the comontary and try to move through the project with more pictures and less chit chat.


 Rather than a diamond here we are looking for the off angled, 4 sided shape above. Although we use the same angles as in the diamond here we assign the length of the enterior side of the shapes length to the same (exactly the same) as the cross cut of the shapes width after the miter cut has been made.
If done correctly the above traiangles can be glued in place with the help of rubber bands. Remember to clean off any excess glue from the exterior of the triangle so the next one will fit snugly along its side after the glue has dried.


Notice there are two rows. These rows may look the same but believe me they are not. To make the final product you will need equal amount of triangles both your first one and then its opposite. These are like gloves. They are identical except they are opposite or face one another. Experiment with your shapes and you will get it.


Each piece gets glued to its opposite.


here is my glue up. Very messy. Augh !!!!
But the result on the right are well worth it and is completely unique.
I assure you that none of your wifes friends or their friends friends have anything remotely like this in their kitchens.
Enjoy